


Inspecting the scanning results and performing file identifications is the main goal when working on a scan. While the scan interface allows you to perform identification file by file, there are also many actions and shortcuts to quickly identify folder or groups of files based on different conditions (extensions, common matches, etc.).
When a folder is selected, the corresponding folder metrics will appear on the right hand side window, which enables additional functionality. Folder metrics shows you the number of files present in the selected folder according to file-tree view and/or file extension (requires webapp_display_extensions_in_folder_metrics to be enabled in the fossid.conf file). Additionally you can also inspect the top matched components and assign component identifications to groups of files matching a specific open source component.
File Identification
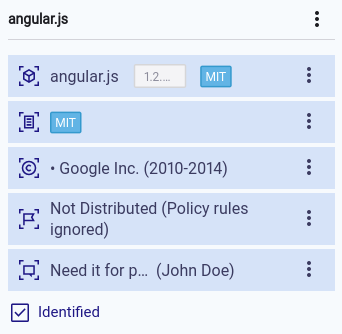
When you select a single file, you will be able to inspect the corresponding open source matches, and the following identification box will appear:
Read more about licenses categories and their color code in here.
Folder Identification
You can also apply bulk identifications to files inside a selected folder. Filters can be selected to affect only desired files.
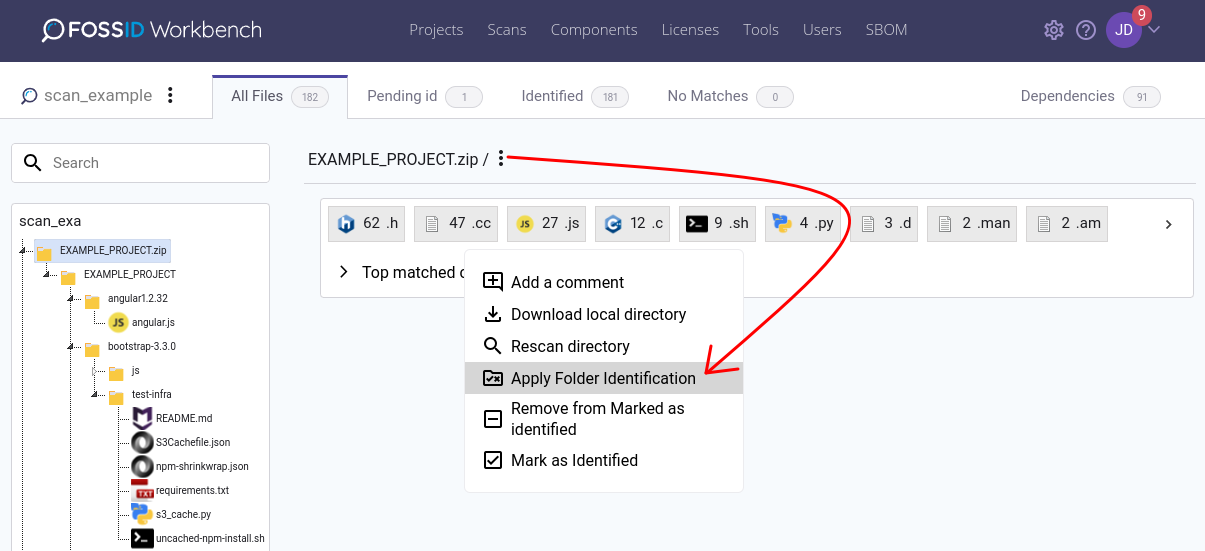
Clicking on ‘Apply Folder Identification’ button will open the selection window.
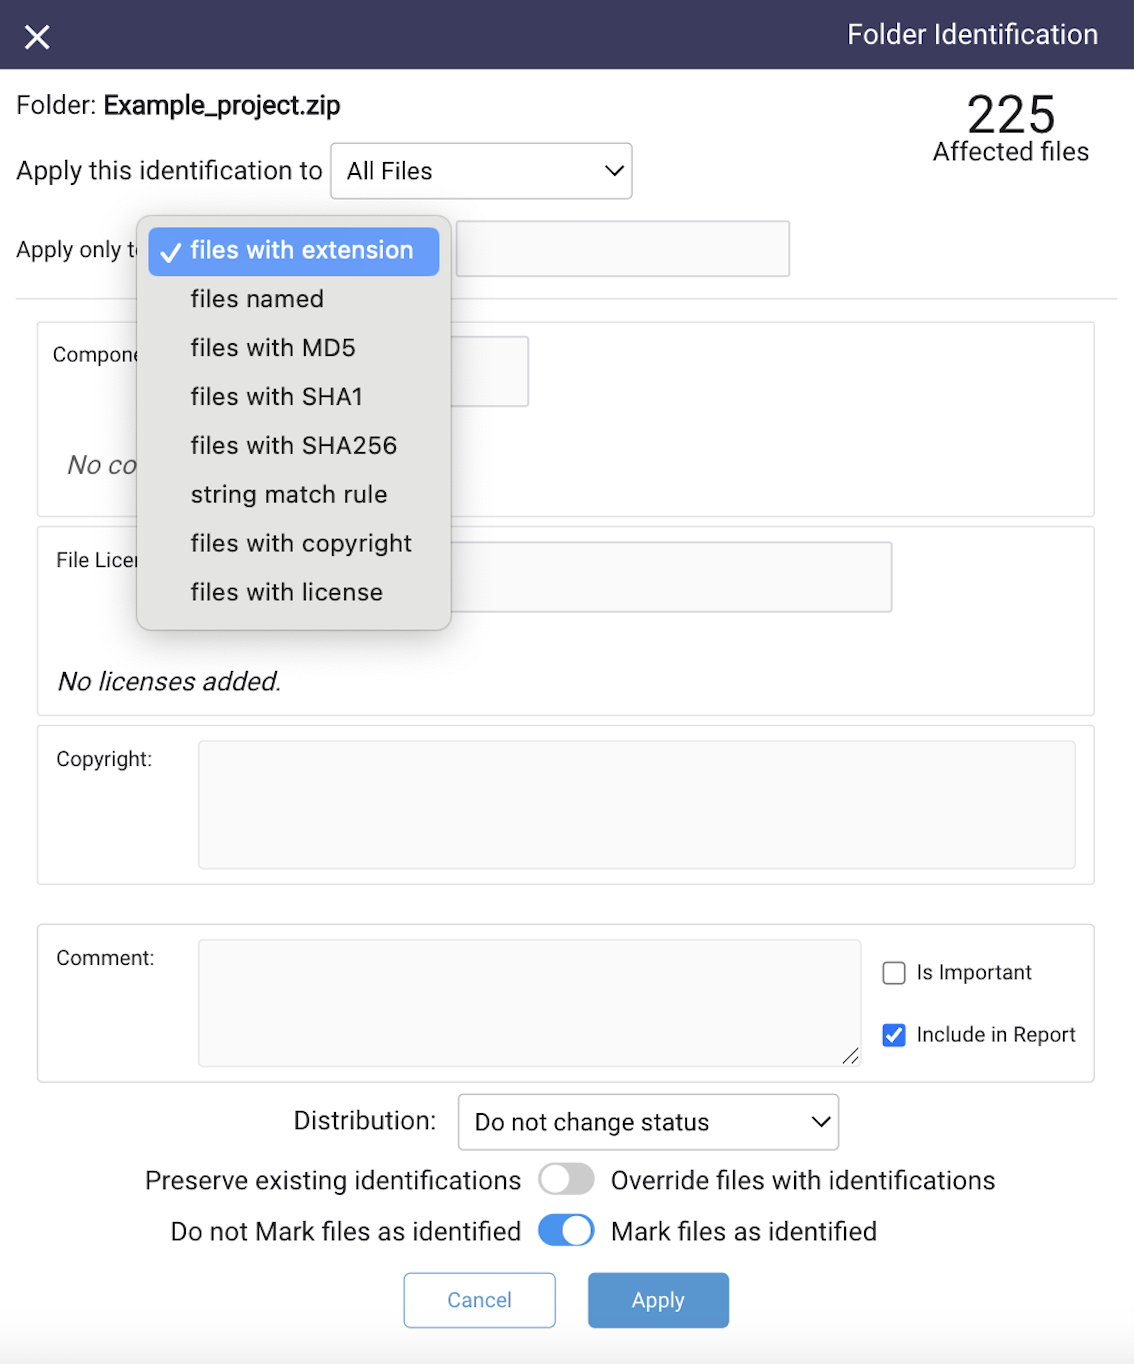
Every time filters are modified the amount of affected files by the action will be refreshed.
- Apply this identification to: selected the view you want to affect with this action.
- Apply only to: Is a set of filters to select the files within the folder you want to affect
- files with extension: You can specify this identification to affect only the files with a desired extension. (example: *.c)
- files named: You can specify this identification to affect only the files with a specific name. (example: jquery)
- files with MD5: You can specify this identification to affect only the files with a specific MD5.
- files with SHA1: You can specify this identification to affect only the files with a specific SHA1.
- files with SHA256: You can specify this identification to affect only the files with a specific SHA256.
- string match rule: You can specify this identification to affect only the files with a specific string match rule.
- files with copyright: You can specify this identification to affect only the files with a specific copyright.
- files with license: You can specify this identification to affect only the files with a specific File or Snippet license.
- Component: You can select an existing component in the database.
- Comment: You can also assigned a comment to the files you want to affect. Additionally you can select if you want to include these comments in the final report.
- Distribution: You can select whether files will be or not be distributed.
- Do not change status: The distribution status remains as it was.
- Set all files as distributed: All files are marked as distributed.
- Set all files as not distributed: All files are marked as not distributed.
- Preserve existing identifications: If this is selected the identifications that already contain information will NOT be affected by preforming the action.
- Override files with identifications:
- The component is always either removed or replaced with the new component.
- File licenses are replaced only when new values are being added.
- Copyright is updated only when new values are being added.
- Mark files as identified: With this option files can be send to Identified.
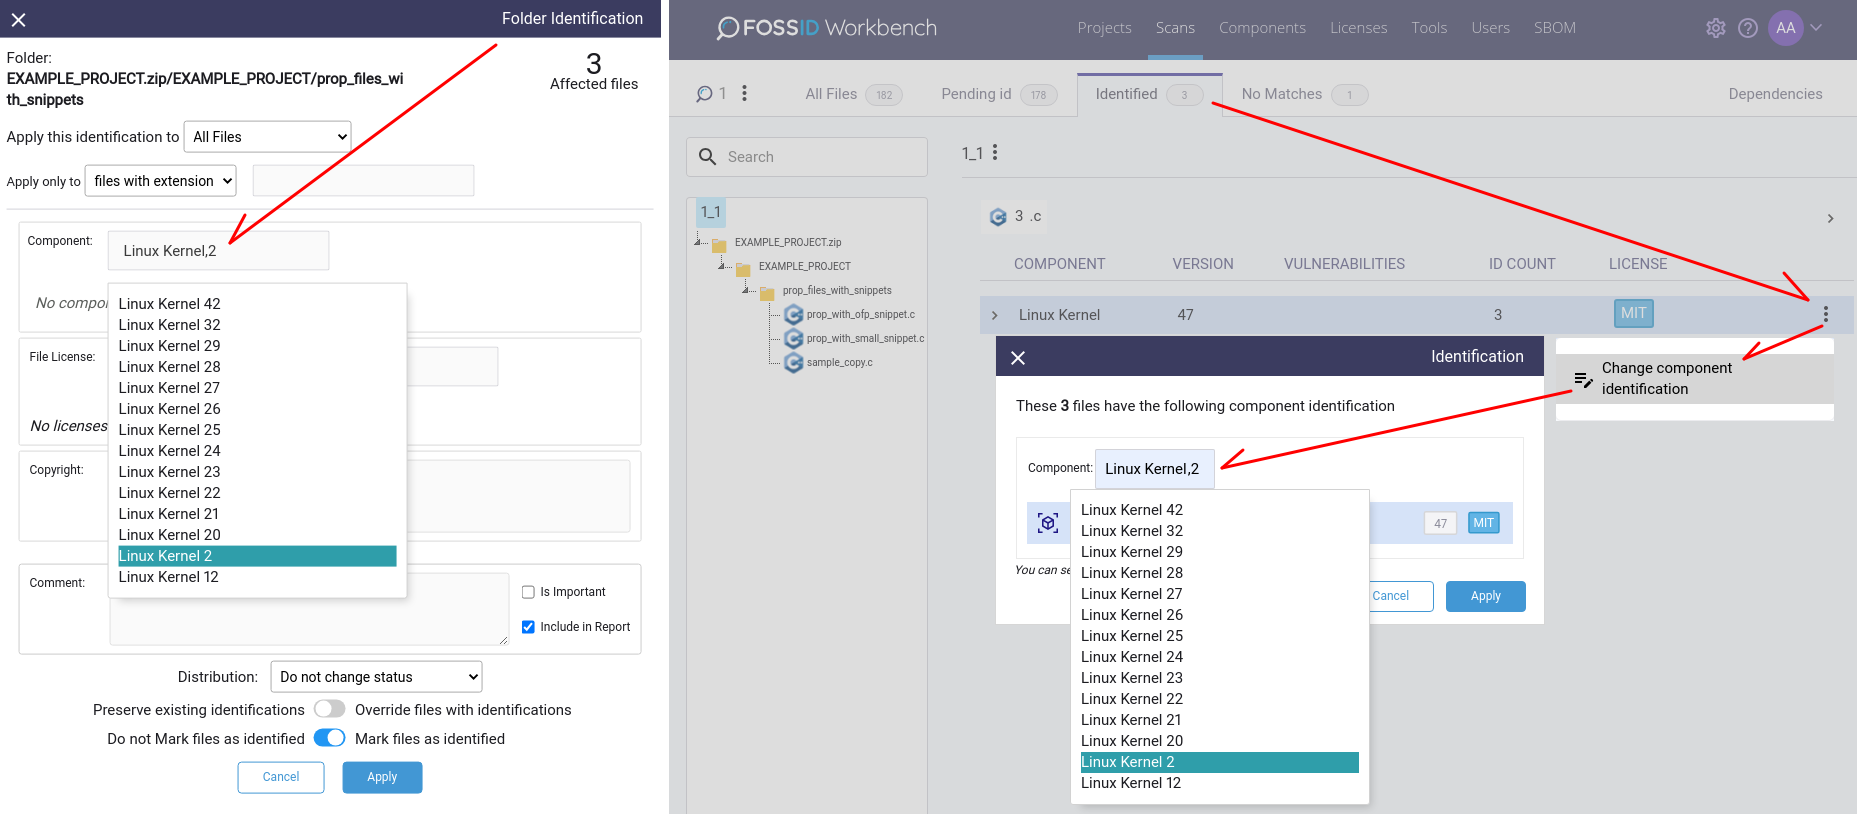
In the identification box you can make component, license and copyright identifications. Note that you will only be able to select existing components and licenses. If you want to select a component or license that doesn’t exist, you need to create it. Moreover, license identification can be done on a file or snippet level, which will be reflected in the reports.
Note that if you have multiple versions of a component you can search for it by typing the component name and version separated by comma (,). Example: Linux Kernel,2
This way of searching is also applicable under the tab “Identified → Change component identification”.
See below the other options and actions available in the identification box (the displayed options will vary depending on the selected file-structure view and other circumstances):
 Mark as Identified: Select this option to clear the file (mark it as done) and move it to the Identified view. Remember that all cleared files can always be found in Identified and also in All Files view.
 Remove from Marked as identified: Click here to remove an already cleared file back from marked as identified view. Note that this icon is only visible when you have selected a file that has been previously marked as identified.
 Reuse identification: The fingerprint icon will show up when there is at least one existing identification for the selected file. You can click on it and select the identification you want to reuse.
 Apply Folder Identification: Select this icon to apply an identification to an entire folder and its contents.
 Add a comment: Click on this icon to add comments related to the selected file. Note that those comments can be seen by other users if they have been added to the project you are working on. Comments can also be marked to be added to applicable reports.
 Download local directory: Clicking here will create a package for download of the selected directory in the tree.
 Rescan directory: Click here to rescan the selected directory.
When browsing the list of open source matches of a given file, the following options will appear:
 Use As Identification: This icon will appear on top of the matched file when you select a match from the list or scan results. Click on it to populate the component, license and copyright info into the identification box.
 Copy To Clipboard: This icon will be displayed for both local and matched files when a file is selected. The action will copy the entire content of the file.
- Download File From FossID Mirror: Enables the download of either the local or the matched file from FossID mirror.
 Go To Next Matching Block: Becomes available only when the match is partial. This option takes you to the next block of highlighted (matching) lines.